VoiceOver を使ったテストを自動化する
TypeScript, Accessibility※この記事は Saitama.js vol.3 の発表内容をもとに記事にしたものです。
アクセシビリティのテストは、静的解析や DOM, Accessibility Tree を走査するものがメジャーとなっているけども、支援技術の挙動をそのままシミュレートするケースは少ない。
今回は VoiceOver の操作を自動化する方法について、導入的な記事を書く。
最近では guidepup のような本格的なスクリーンリーダー自動化ライブラリも出てきたので、挙動を調べる際の予備知識として参考になるかと思う。
AppleScript について
AppleScript は MacOS の操作を自動化する Apple のスクリプト言語で、MacOS であればターミナル経由で実行できる。
shell
osascript -e 'say "Hello World"'
VoiceOver の操作もこの AppleScript から操作できるので、それを使ってやるという作戦。
初期設定
まずは VoiceOver を AppleScript で実行するために、許可が必要。
Macの設定から「アクセシビリティ」→「VoiceOver」→「VoiceOverユーティリティ」を選択し、VoiceOverユーティリティを開いて、「AppleScriptによるVoiceOverの制御を許可」にチェックを入れる。
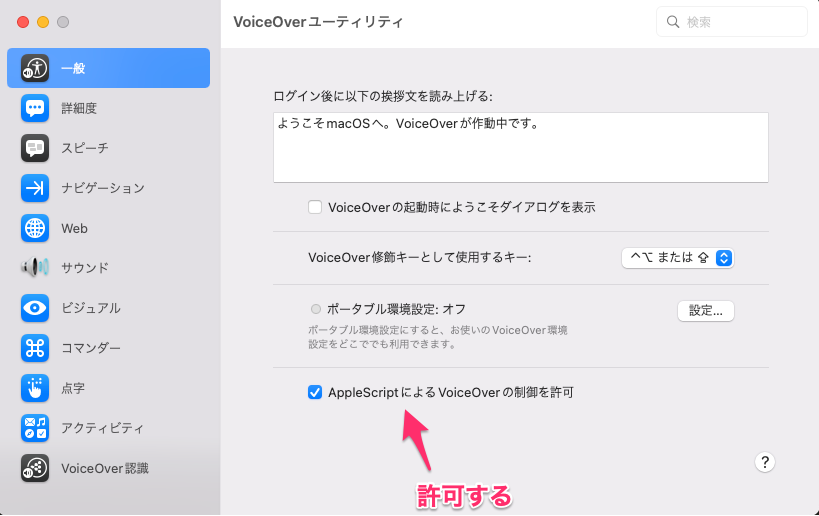
また、VoiceOver の初回起動時は、チュートリアルが開始されるようになっているので、VoiceOver を起動したことがなければしておく。
参考: MacでVoiceOverをオン/オフにする - Apple サポート (日本)
VoiceOver を起動する
VoiceOverStarter を直接立ち上げる。
shell
/System/Library/CoreServices/VoiceOver.app/Contents/MacOS/VoiceOverStarter
AppleScript 経由で VoiceOver を動かす
次に、AppleScript を使って VoiceOver を操作してみる。しかし AppleScript 自体についてのドキュメント自体は多々あるけども、VoiceOver を操作する際のリファレンスは皆無で、何を実行すればいいのかわらない。
そこで、「スクリプトエディタ.app」に VoiceOver.app(パスは /System/Library/CoreServices/VoiceOver.app)をドラッグ&ドロップすると、VoiceOver 向けのドキュメントが開く。このドキュメントを読みながら、使用できるプロパティを調べる。
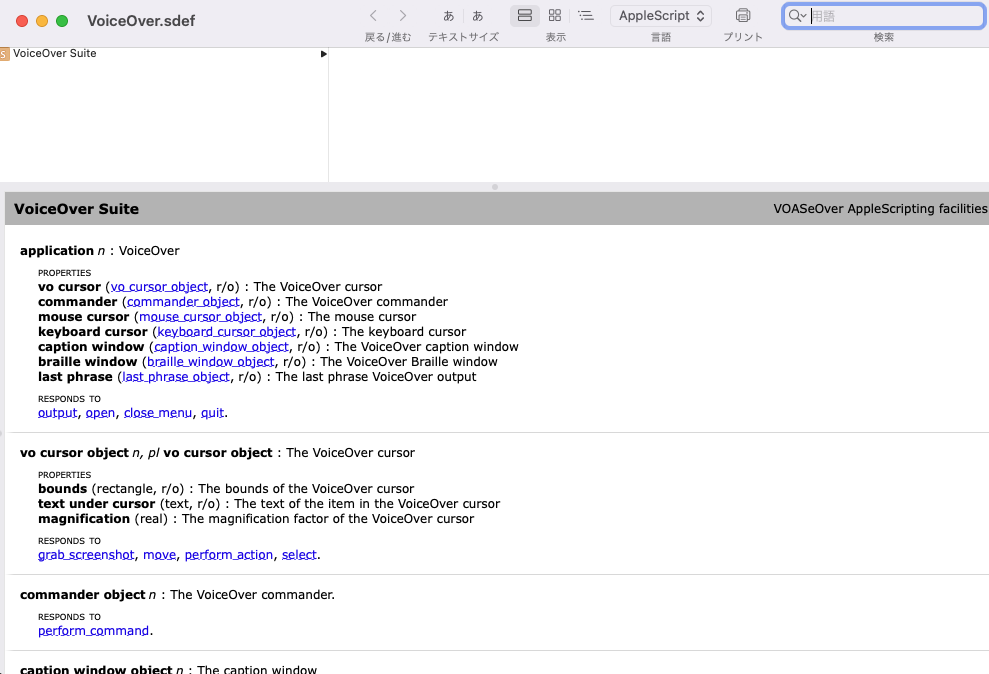
まず "VoiceOver" に何らかの命令を実行するための基本形として tell application "VoiceOver" to を記述する。
shell
osascript -e 'tell application "VoiceOver" to <何らかのコマンド>'
ここから頑張って書いていく。
例えば、終了したい時は、 quit を tell する。
shell
osascript -e 'tell application "VoiceOver" to quit'
もう少し複雑な例として、VoiceOver のカーソルである vo cursor オブジェクトに、指定する場所に移動してほしい時は move to コマンドを記述し、対象を画面上の最初の要素にしたい時はそこから first item を指定する。
shell
osascript -e 'tell application "VoiceOver" to tell vo cursor to move to first item'
VoiceOver を実行した状態でこれらのスクリプトを実行すると、VoiceOver が終了したり、カーソルが最初の要素に移動したりする。
書いてみる
Chrome を立ち上げて任意のページを開き、以下を Node 16 以上で実行すると、Chrome で最初に読み上げた要素がログとして出力される。
index.js
const { execSync } = require('child_process')
const { setTimeout } = require('timers/promises')

const main = async () => {
  execSync(`open "/Applications/Google Chrome.app"`) // Chrome 起動
  execSync(
    `/System/Library/CoreServices/VoiceOver.app/Contents/MacOS/VoiceOverStarter`,
  ) // VoiceOver 起動
  await setTimeout(2000) // VoiceOver の立ち上がり時間があるので少し待つ
  execSync(
    `osascript -e 'tell application "VoiceOver" to tell vo cursor to move to first item'`,
  ) // 最初の要素にカーソルを合わせる
  const lastPhrase = execSync(
    `osascript -e 'tell application "VoiceOver" to return content of last phrase'`,
  ).toString('utf-8')
  console.log(lastPhrase) // 最後に読み上げた言葉を文字列として出力
  execSync(`osascript -e 'tell application "VoiceOver" to quit'`) // 終了する
}

main()
MacOS には AppleScript の JavaScript 版である JXA がビルトインされているので、実際にはもう少しスマートに書けると思う(今回は使わなかった)。
動かしてみる
サンプルリポジトリ(voiceover-test-automation)を用意した。 テスト対象の HTML は次の通り。
index.html
<!DOCTYPE html>
<html lang="ja">
  <head>
    <meta charset="UTF-8" />
    <meta http-equiv="X-UA-Compatible" content="IE=edge" />
    <meta name="viewport" content="width=device-width, initial-scale=1.0" />
    <title>example</title>
  </head>
  <body>
    <h1>私のホームページへようこそ</h1>
    <img
      src="./baby_music_piano_boy.png"
      alt="赤ちゃんが座って笑顔でピアニカを弾いてる"
    />
    <button id="js-button">今日の占い</button>
    <div aria-atomic="true" aria-live="assertive">
      <p id="js-result">工事中のコンテンツです。</p>
    </div>
    <script>
      document.addEventListener('DOMContentLoaded', function () {
        document
          .getElementById('js-button')
          .addEventListener('click', function () {
            document.getElementById('js-result').innerText = 'エラーです'
          })
      })
    </script>
  </body>
</html>
この HTML から、以下をテストする。
<h1>の見出しを読み上げるか<img>の alt を読み上げるか<button>をクリックした時に、aria-live="assertive"を持つ<div>の変更内容を読み上げるか
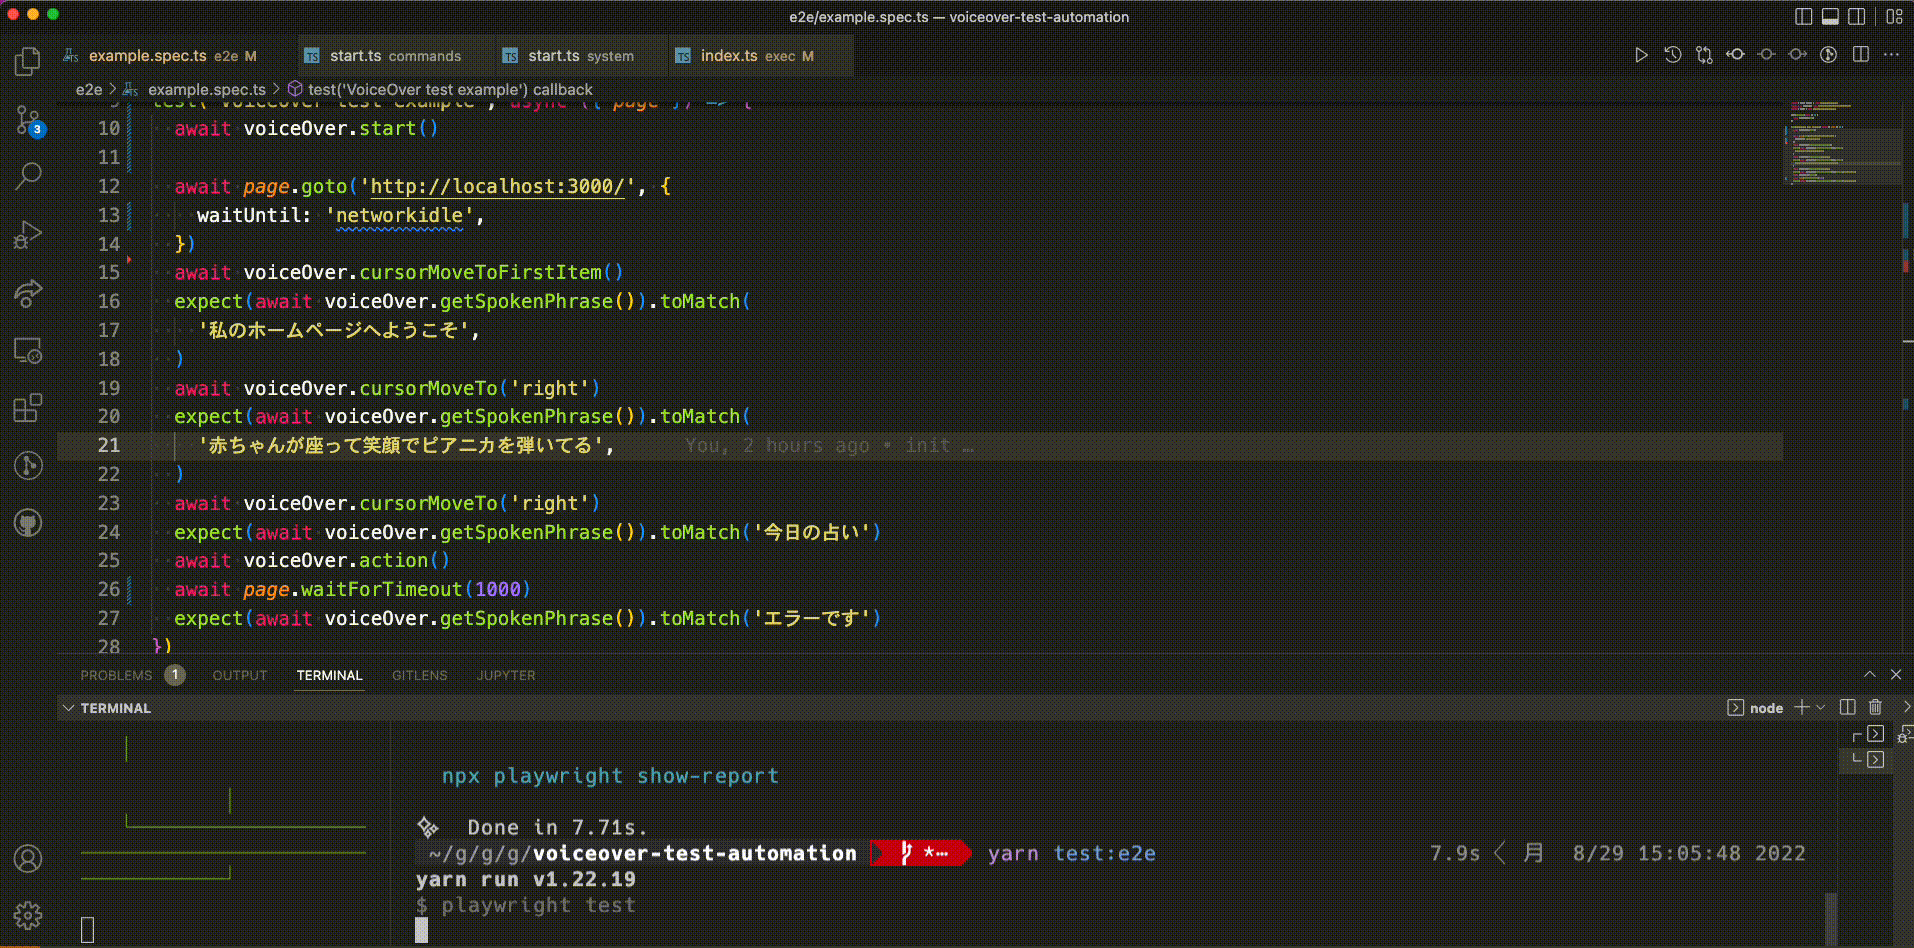
テストコードは次の通り(Playwright を使用した)。 osascript の内容は、先ほど説明した内容と同じなので、src/macos/voiceover としてラップした。
e2e/example.spec.ts
import { test, expect } from '@playwright/test'
import * as voiceOver from '../src/macos/voiceover/index.js'

test.afterAll(async () => {
  await voiceOver.end()
})

test('VoiceOver test example', async ({ page }) => {
  await page.goto('http://localhost:3000/', {
    waitUntil: 'networkidle',
  })
  await page.waitForTimeout(5000)
  await voiceOver.start()
  // await voiceOver.cursorMoveTo('into item')
  await voiceOver.cursorMoveToFirstItem()
  expect(await voiceOver.getSpokenPhrase()).toMatch(
    '私のホームページへようこそ',
  )
  await voiceOver.cursorMoveTo('right')
  expect(await voiceOver.getSpokenPhrase()).toMatch(
    '赤ちゃんが座って笑顔でピアニカを弾いてる',
  )
  await voiceOver.cursorMoveTo('right')
  expect(await voiceOver.getSpokenPhrase()).toMatch('今日の占い')
  await voiceOver.action()
  await page.waitForTimeout(1000)
  expect(await voiceOver.getSpokenPhrase()).toMatch('エラーです')
})
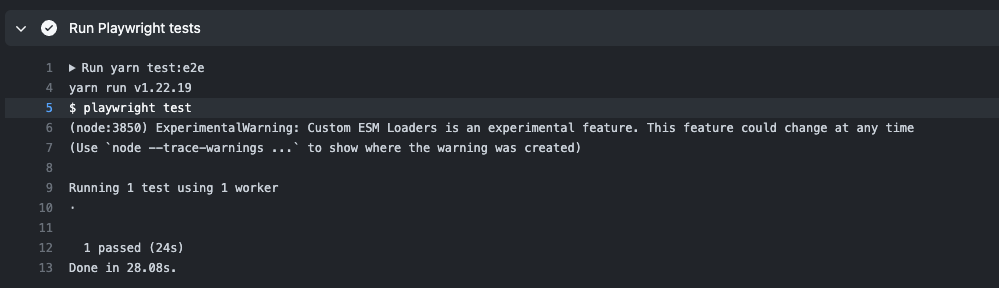
実際にテストしてみると、うまくいっていることがわかる。
GitHub Actions で動かしてみる
次に GitHub Actions の Mac インスタンスで動かしてみる。
「初期設定」の項目でやった設定を、CI でも変更する必要がある。
まず「AppleScriptによるVoiceOverの制御を許可」については、次のコマンドで実行できる。
shell
defaults write com.apple.VoiceOver4/default SCREnableAppleScript -bool true
sudo bash -c 'echo -n "a" > /private/var/db/Accessibility/.VoiceOverAppleScriptEnabled'
また、VoiceOver 初回起動時に表示されるチュートリアル画面は doNotShowSplashScreen フラグを true にするとスキップできる。
shell
defaults write com.apple. VoiceOverTraining doNotShowSplashScreen -bool true
これだけ書くと簡単に見えるけど、実際は High Sierra 以降の OS に搭載された SIP によって、CI 側の設定を変えるのが難しい。
guidepup がうまいこと設定してくれる Guidepup Setup Action を用意しているので、そちらを使う。
これで動くはず。書いた yml はこちら
終わり
AppleScript 経由で VoiceOver の自動化をして、それを Playwright に組み込んでテストすることができた。
VoiceOver に関するリファレンスが少ないのは致命的だけど、現在は VoiceOver を使用したテストを書くための唯一の方法となっている。
プロダクトレベルでテストする機会は非常に少ないと思うけど、Storybook に組み込んだりしてもよさそう。