Elmのお勉強3: webアプリの作成 前編
ElmElmアーキテクチャについて
Elm アーキテクチャでは、3 つの項目によって成り立っている。
- Model … ステート
- Update … ステートの更新。メッセージ(Msg)を受け取って Model を更新。
- View … html への描画。
これらの頭文字をとって、MVU(Model-View-Update)アーキテクチャとも呼ばれるらしい。
単純なhtmlの作成
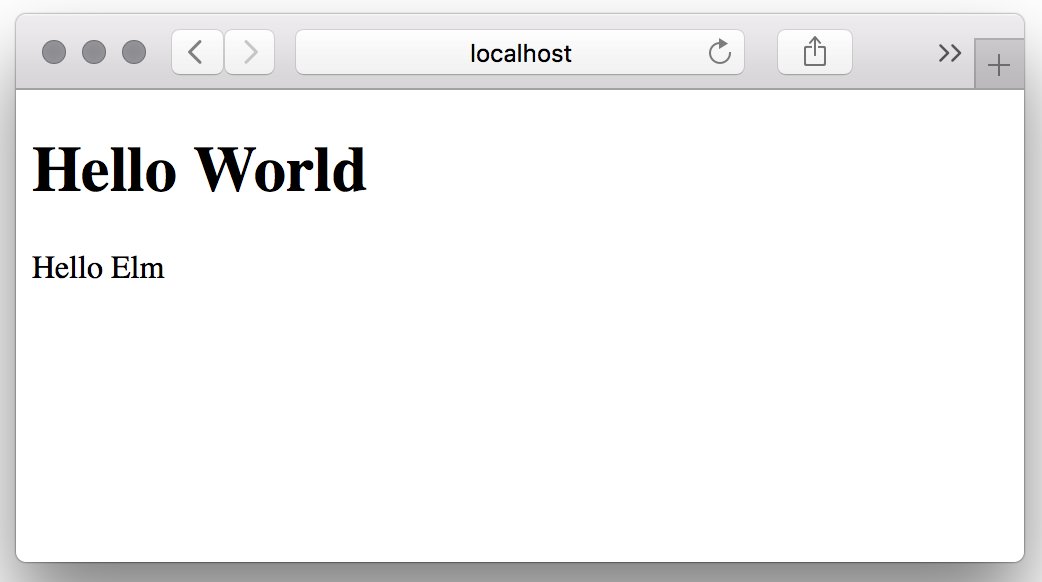
h1 と p を置いただけの html を表示させてみる。
module Main exposing (main)

import Html exposing (..)
import Html.Attributes exposing (..)


main =
    main_ [ class "main" ]
        [ h1 [ class "title" ] [ text "Hello World" ]
        , p [ class "text" ] [ text "Hello Elm" ]
        ]
はじめに、div, h1, p などの要素を取得するために Html モジュールを丸ごとインポート。
次に、Attribute(属性値)も設定するため、Html.Attributes もインポートしている。
main 関数の中で、描写する html 部分を記述している。
div [] [ text "Foo" ] のように書いていく。
今回は Html.Attributes をインポートしているので、1 つ目の引数[]に class 関数を入れて、class を指定できている。
また、上コードのように、第 2 引数の[]に要素を書けば入れ子にできる。
保存したら elm reactor でローカルホストを立ち上げ、elm ファイルにアクセスする。
elm reactor
表示される。
Modelの作成
さっきのコードは、main 内で Html モジュールを用いて静的なページを作成しただけ。
次は Elm アーキテクチャに結びつける。
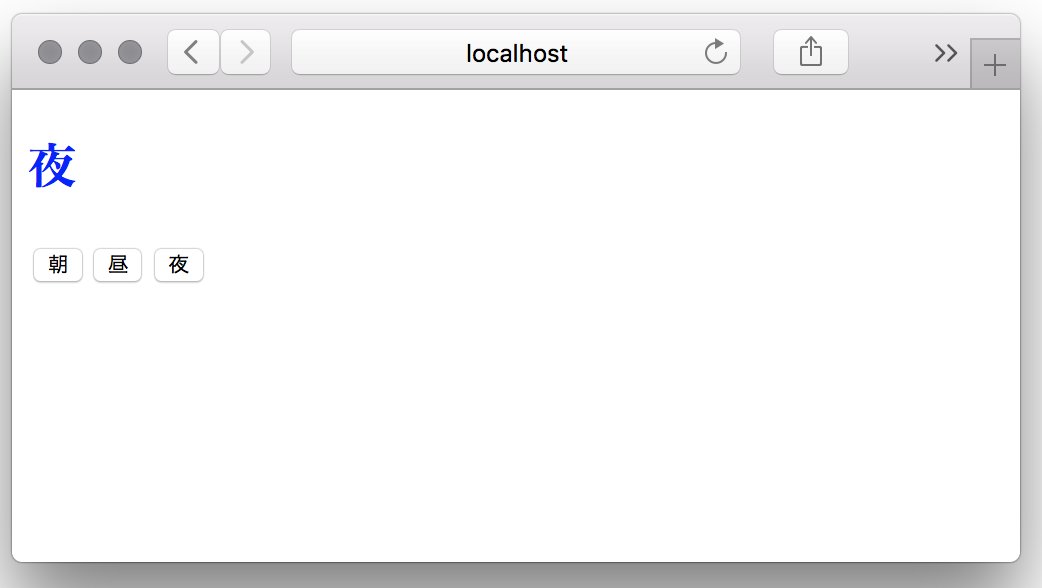
「朝」「昼」「夜」の 3 ボタンがあって、押すとタイトルと文字色が変わるだけのものを作ってみる。
最初の行に import Browser を追加。
Browser は、プログラムの作成に特化したモジュール。
main 関数に、 Browser.sandbox を定義する。
main =
    Browser.sandbox { init = init, update = update, view = view }
Browser.sandbox は、HTTP 通信や JavaScript との連携ができない初心者向けのもの。
これが Browser.element -> Browser.document -> Browser.application…となることでやれることが多くなる。
レコードの中には、init(初期化されたステート)、update(更新用)、view(描写部分)が入る。
Modelの作成
まず、Model 部分を記述していく。
-- Model


-- time, colorという情報がStringで入る
type alias Model =
    { time : String
    , color : String
    }


-- 初期状態
init : Model
init =
    { time = "昼"
    , color = "green"
    }
Updateの作成
update 部分には、まず Msg というユニオン型を用意して、
そこに中身を入れていく。
-- Update


type Msg
    = Morning
    | Noon
    | Night
次に、update 関数を置き、
case 文で、ユニオン型を使って分岐させる。
update msg model =
    case msg of
        Morning ->
            { model | time = "朝", color = "red" }

        Noon ->
            { model | time = init.time, color = init.color }

        Night ->
            { model | time = "夜", color = "blue" }
ユニオン型の中身と case 文の中身が一致しない、足りない場合はエラーが出る。
Viewの作成
View 部分では button を置き、第二引数に [ onClick Msg内の値 ] を指定する。
-- View


view model =
    main_ [ class "main" ]
        [ h2 [ style "color" model.color ] [ text model.time ]
        , button [ onClick Morning ] [ text "朝" ]
        , button [ onClick Noon ] [ text "昼" ]
        , button [ onClick Night ] [ text "夜" ]
        ]
最終的なコード
import Browser
import Html exposing (..)
import Html.Attributes exposing (..)
import Html.Events exposing (..)


main =
    Browser.sandbox { init = init, update = update, view = view }


-- Model


type alias Model =
    { time : String
    , color : String
    }


init : Model
init =
    { time = "昼"
    , color = "green"
    }


-- Update


type Msg
    = Morning
    | Noon
    | Night


update msg model =
    case msg of
        Morning ->
            { model | time = "朝", color = "red" }

        Noon ->
            { model | time = init.time, color = init.color }

        Night ->
            { model | time = "夜", color = "blue" }


-- View


view model =
    main_ [ class "main" ]
        [ h2 [ style "color" model.color ] [ text model.time ]
        , button [ onClick Morning ] [ text "朝" ]
        , button [ onClick Noon ] [ text "昼" ]
        , button [ onClick Night ] [ text "夜" ]
        ]
流れ
Model
{ time: String } の Model 型が定義される。
init で、model の初期値を time: "昼" にする。
View
button [ onClick Night ] でボタンを描画し、それを押すと、 Html.Event によってイベントが渡される。
その際 Msg に、Night が渡される。
Update
Msg が受け取った Night を、update 関数の case 文を参照して処理を決める。
case 文では、全てのパターンが存在することをコンパイル前の段階で保証するので、Night がなかった時は考えない。
Night での処理によって、 model.time の値が「夜」model.color の値が "blue" に更新される。